Table of contents
Sensory room essentials for a beginner are straightforward: prioritise safe, controllable comfort (lighting, seating, sound), then add a small set of sensory tools that match a child’s regulation needs. A well-designed sensory room setup can support autism, ADHD, sensory processing disorder, and even dementia-related distress by helping individuals shift state more predictably and calmly.
Drawing on hands-on practice across home, school, and therapy settings, the most effective sensory room starts with “foundation equipment” rather than an overwhelming collection of gadgets. The primary keyword—sensory room equipment—matters most when it is used intentionally, with the right boundaries and with clear plans for when each tool is offered and when it is removed.
Highlights
- Essential sensory room equipment begins with safe control of light, sound, and comfortable body positioning.
- Choose purpose-built regulation tools (heavy work, tactile input, gentle visual/auditory stimulation), not random sensory items.
- Include a clear “quiet-down” area and a sensory menu so staff and family can use equipment consistently.
- Plan for safety, maintenance, and sensory fit to avoid overstimulation and use-wear.
Start with the “why”: sensory regulation, not entertainment
A sensory room is not a playroom and it should not feel like a switching-on festival of lights and sound. For many autistic children and adults—especially those who experience sensory overload—too many overlapping inputs can escalate distress. The sensory room equipment that helps most is the equipment that reduces uncertainty and offers modulated input.
In practical terms, the room should support self-regulation by offering predictable sensory experiences: calming visual input, contained tactile play, and body-based input that helps with arousal levels. In education settings, this often means fewer items out at once, scheduled breaks, and consistent staff training so the room becomes a reliable tool rather than an unpredictable environment.
Definition: what “sensory modulation” means
Sensory modulation is the ability to manage sensory input so the body can achieve an optimal alertness level. In a sensory room, equipment is selected to help a person move toward that level using controlled stimuli—rather than forcing calm through intense or constant stimulation.
For beginners, the key decision is whether the sensory room is primarily for calming (down-regulation), primarily for engagement (up-regulation), or a balanced mix. Many families start with a calming layout because it is easier to use safely for a wide range of needs—then add activation tools later once patterns are clear.
The beginner essential foundation: safety + control first
Before selecting sensory tools, the room needs basic “control surfaces” that professionals rely on: adjustable lighting, manageable acoustics, safe floor and wall protection, and a comfortable base where the body can settle. This foundation prevents two common problems: overstimulation from harsh light and echo, or unsafe movement when a child seeks input through heavy body activity.
Consider this as building a regulation system. If the lighting cannot be dimmed, or if sound bounces around the room, staff may unknowingly deliver extreme input. If the floor is slippery, or walls are uncovered, energetic regulation attempts can lead to injuries—making the sensory room less likely to be trusted.
1) Lighting you can dim (and customise)
Lighting is usually the first “essential” sensory room equipment because it directly affects the nervous system. A beginner setup should include soft, indirect light or low-glare illumination. Dimming is essential; sudden brightness changes can trigger stress in people with autism and anxiety.
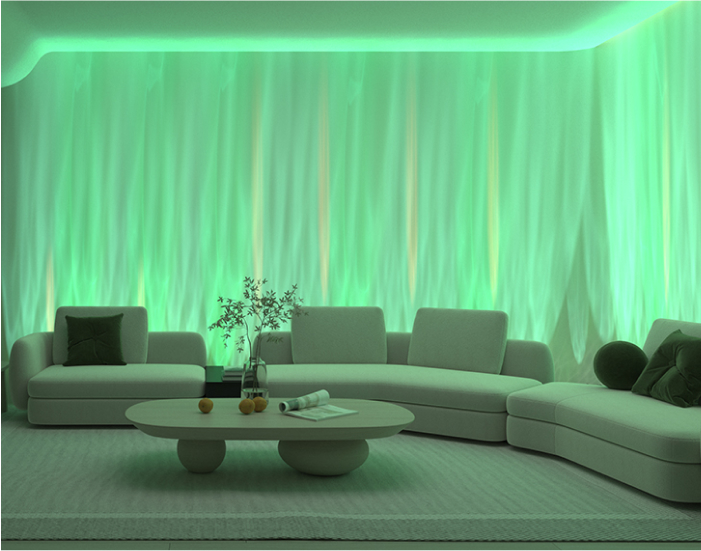
Many sensory spaces use one visual anchor—such as a projector—rather than bright, multi-colour ceiling lighting. A good example is offering a projected ceiling scene from a Galaxy Projector rather than constantly cycling novelty lights.
Effective vs poor: in an effective setup, light is consistent and controllable, with one or two gentle visual elements. In a poor setup, multiple lamps and colour strings compete, forcing the child to filter all inputs—often leading to avoidance or escalation.
2) Sound control and “quiet cues”
A sensory room can have sound input by design (like a soft music track), but most beginners need sound control first. Hard flooring and bare walls create echo and amplify unpredictable noises, which can worsen anxiety in ADHD and autism.
Actionable steps include adding soft furnishings where appropriate, using door seals or curtains to reduce external noise, and deciding whether the room should be silent or have a predictable “background.” In schools, it helps to agree a staff rule: either the room is “quiet only” or it has a specific playlist—never a rotating selection.
Real-world example: one mainstream classroom team used the same calm audio track for 6 weeks. As familiarity increased, the sensory room became less of a “surprise event” and more of a “known cue,” improving use during transitions.
3) Safe floor and body protection
Many sensory room users seek movement—rolling, rocking, bouncing, or running down a path. That is why safe flooring matters more than people expect. Non-slip surfaces reduce injuries and make regulation attempts safer.
Where impact is likely, protect head and high-contact areas with padding. For beginners, this often means addressing corners, nearby furniture edges, and any wall areas where a child might crash during dysregulation. A simple but often overlooked step is checking for trip hazards from wires and unsecured mats.
If budget allows, use wall padding rated for child safety. If budget is tight, temporarily protect high-impact zones with removable, washable padding so the room can be improved iteratively.
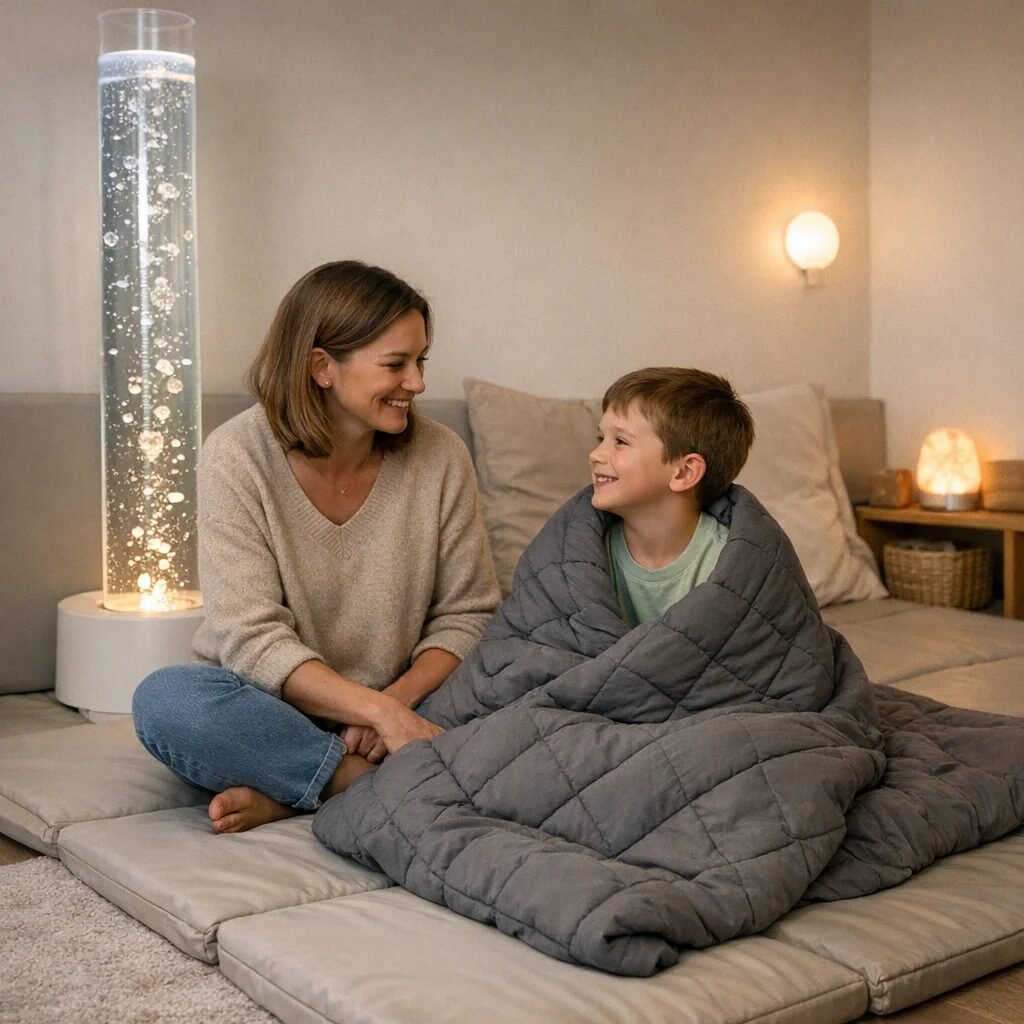
Seating and comfort: the essential “body anchor”
Comfort equipment is not optional in good sensory room design—especially for autism, where posture and bodily comfort can affect emotional regulation. A beginner sensory room should include one reliable seating option that can be used during calm periods and during “coming down.”
The goal is not to trap someone in a chair. The goal is to provide stable, supportive positioning that reduces sensory noise from the body itself (wobbly balance, uncomfortable pressure, or distracting posture). When support is consistent, the brain can focus on calming regulation rather than searching for balance.
Choose posture support that fits the person
Some children regulate best with deep pressure and enclosed seating; others need a gentle rocking option or a soft surface to sink into. Bean bags can work in some homes, but in schools they require careful consideration for hygiene and supervising movement.
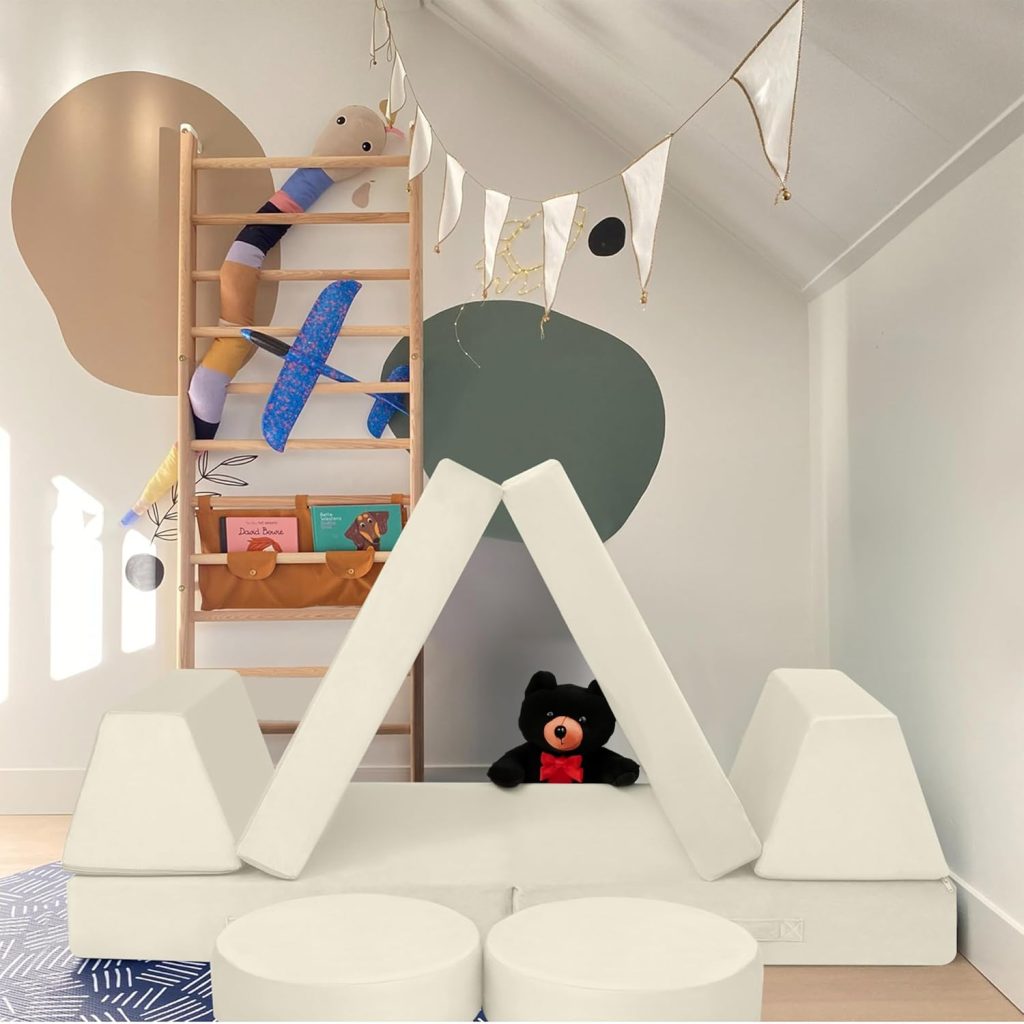
Examples of seating-type equipment that often stabilise a sensory experience include a modular play seating arrangement like Kids Modular Play Sofa or a compact modular couch setup such as Modular Kids Couch.
Effective vs poor: effective seating matches regulation style (pressure, containment, or stability) and is comfortable enough to remain in use during longer sessions. Poor seating forces slumping, causes discomfort, or becomes “a toy,” leading to distraction during regulation attempts.
Core sensory tools (beginner pack): fewer, better, safer
Beginner sensory rooms usually fail when they try to include everything. Sensory rooms are more effective when the selection is limited and purposeful. Professionals often recommend a “starter toolkit” that covers the main sensory pathways: tactile, proprioceptive (body awareness), and visual/auditory calm.
Rather than buying numerous items, beginners should aim for 6–12 sensory room items that cover each sensory goal. Items should be rotated and only placed within reach when needed—especially for children with autism and ADHD who can become novelty-seeking.
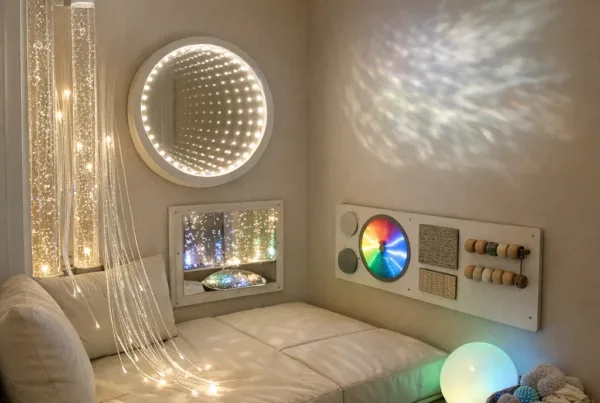
Tactile input: controlled, safe, and purposeful
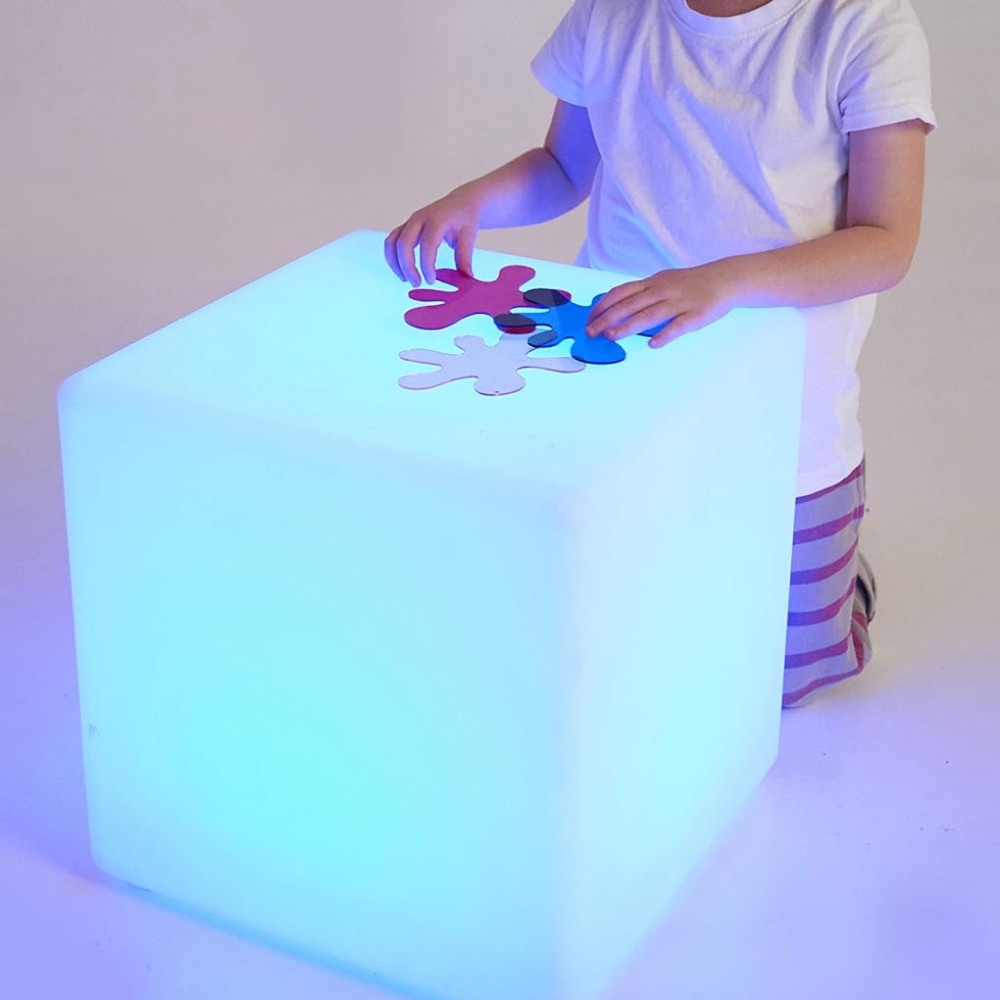
Tactile tools should encourage calming or exploration without becoming messy, sharp, or loud. Small tactile surfaces can be used for short sessions, while contained play can be used in longer regulation breaks.
A beginner tactile anchor could be a tactile tile or texture board, such as Mini Tactile Sensory Tiles. These are easy to supervise, easy to clean, and easy to use as short “sensory checks” during transitions.
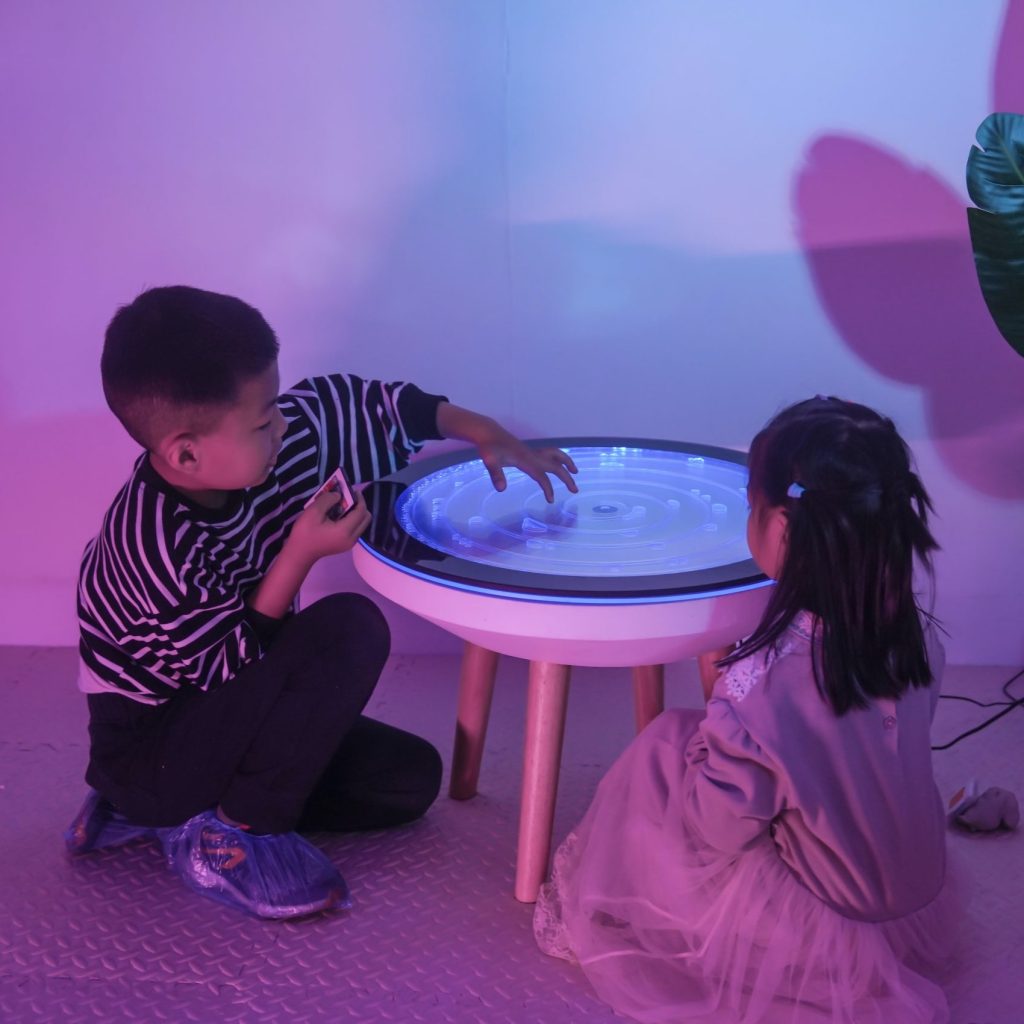
If the child benefits from ongoing visual-tactile calm, contained bubble effects can be helpful—but only if they can be supervised and controlled. For families who want one focal element, water/bubble systems can provide rhythmic attention with less demand than constant conversation. A compact option like Bubble Tube Tank Vortex Tower can support calm watching when used consistently and not as an all-day distraction.
Real-world tip: introduce tactile items during a neutral mood, not during peak distress. Many children learn the sensory “menu” through calm repetition.
Proprioceptive input (“heavy work”) for self-regulation
Proprioceptive input—pressure through the joints and muscles—often supports regulation in autism and ADHD. Beginners should include at least one item that offers safe, predictable heavy work or deep pressure, or a movement option that discharges energy without causing chaos.
Examples include weighted cushions, therapy balls used appropriately, or a dedicated movement space (like foam steps or climbing blocks) if the room design allows. In therapy practice, proprioceptive tools are typically used with clear rules: short sessions, consistent duration, and predictable return to calm activities.
Common mistake: using heavy-input tools too late. If a child is already in crisis, pressure may feel overwhelming. Many professionals find it works better to offer proprioceptive input during early warning signs (fidgeting increases, vocal volume changes, pacing starts).
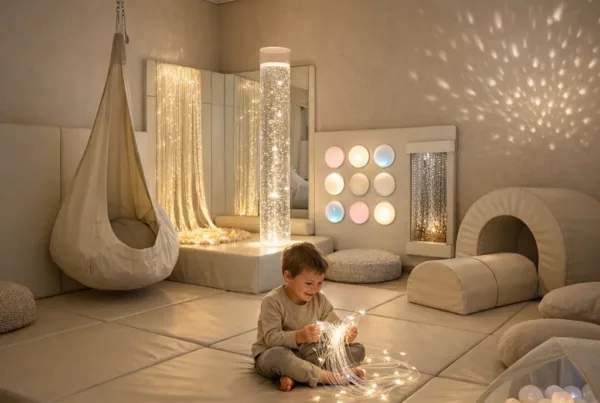
Visual calm: one focal tool, not ten
Visual equipment can be calming when it is predictable and controllable. Beginners often start with projectors or gentle mood lights because they can reduce the need for verbal engagement and provide steady sensory structure.
For example, a projector like Galaxy Projector (or a similar model) can become the room’s “default calm” item when brightness is set low and motion/colour change is kept slow.
Some children get overwhelmed by glittering or rapidly shifting visuals. In those cases, fixed warm light is preferred over constantly moving patterns. This is where trial sessions matter: adjust one variable at a time.
How to set up your beginner sensory room step-by-step
A simple, repeatable setup process prevents equipment from becoming clutter and ensures the room stays safe. Many families create the room and then struggle with “what do we do now?” The solution is to plan layout zones and a short sensory routine before adding more items.
Step 1: Map zones (calm, sensory tools, breaks)
At minimum, plan three areas:
- Cozy/safe base: seating, soft bedding/throw, and the ability to withdraw.
- Sensory tool zone: tactile items and a small number of equipment options.
- Movement zone: only if space and safety allow; keep it clearly bounded.
In a typical school setting, the movement zone might be a corner with foam blocks and stepping stones rather than a large open area. At home, it may be a small rug area to contain movement.
Step 2: Choose one “starter menu” for each need
Professionals often recommend a sensory menu card for staff and carers. The menu lists the exact tools for each state, such as “I need to calm” (projected light, tactile tile, quiet seating) or “I need to feel pressure” (weighted items or short heavy-work activity).
A sensory menu reduces decision fatigue for families and improves consistency—critical for autism and ADHD where predictability lowers anxiety.
Step 3: Trial each item with short sessions
Test tools when the child is calm or mildly regulated. Start with 2–5 minutes, then observe: Was the child calmer afterward? Did the tool become distracting or escalate? Was attention improved or did sensory input become irritating?
If a tool increases agitation, it may be too intense, too novel, or offered too long. Adjust only one thing at a time: brightness, duration, proximity, or frequency.
For adults with sensory processing challenges due to dementia, the same principle applies: introduce one gentle visual anchor or familiar tactile texture at a time, and prioritise comfort over added stimulation. Many care teams use soft, predictable light changes rather than colourful novelty.
Step 4: Create “start and stop” routines
Clear entry and exit routines help prevent overstimulation. For example: dim lights → sit at base → choose one tool → finish with a consistent cue (closing eyes with a soft tactile item, or returning to seating).
In therapy sessions, an end routine can also support learning. A child learns that the sensory room is time-bounded and safe, rather than endless.
Common mistakes (and how to avoid them)
Beginner mistakes are rarely about bad intentions. They usually occur because sensory rooms are treated like entertainment hubs or because regulation needs change over time. The nervous system learns patterns—so sensory room equipment must become consistent, not random.
Mistake 1: Too many sensory inputs at once
Overlapping lights, sound effects, tactile motion, and reflective surfaces can overload attention. This is especially likely for children with autism who may struggle with filtering competing sensory streams.
Fix: use a “one focal item” rule. If a projector is on, keep other lights off. Keep bubble features off when using tactile tools, unless both reliably calm the individual.
Mistake 2: No clear boundaries or safety checks
Even gentle equipment can become unsafe if wires are accessible, if items can be thrown, or if surfaces become slippery. This affects everyone and can reduce trust in the room.
Fix: cable-manage everything, anchor moveable equipment, and remove breakables. For wall proximity, protect collision areas with appropriate padding.
Mistake 3: Using sensory equipment as a “reward” only
When sensory tools are offered only after a long meltdown, they may become associated with distress. The child learns that dysregulation “unlocks” the room, and staff may feel pressured to keep the situation going.
Fix: use equipment preventatively and consistently. Offer the room menu at the first signs of escalation, not just after crisis.
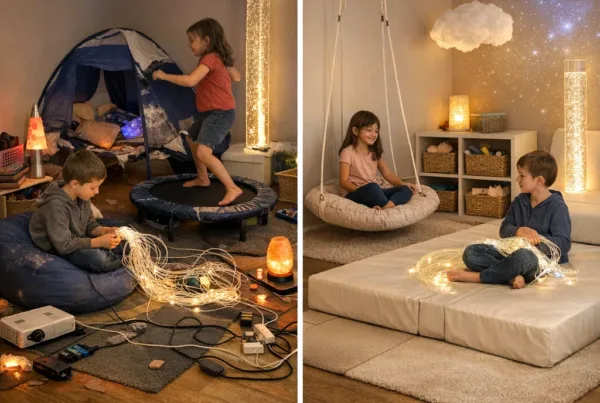
Contrasting scenarios: what works vs what doesn’t
Real outcomes come from matching sensory equipment to a person’s patterns. Two brief scenarios illustrate why beginners should focus on regulation fit rather than “cool factor.”
Scenario A: Effective setup
A primary school uses dim, warm lighting, quiet acoustics, and one projector as the default calm. Seating is stable, tactile tools are limited to one or two items within reach, and movement space is bounded with foam blocks. Staff use a simple sensory menu and track whether each child is calmer after 5–10 minutes.
Over weeks, sensory time increases as predictability improves. The sensory room becomes a planned intervention during transitions, not an emergency response.
Scenario B: Poor setup
A home sensory room is filled with flashing lights, loud toys, reflective surfaces, and multiple stimulus devices running at once. The child is allowed to explore freely during dysregulation, with no start/stop routine. As sensory input increases, the child spends less time settling and more time seeking stimulation or avoiding the room.
After modifications—dimmed lighting, reduced item count, controlled use duration—the room regains effectiveness because sensory input becomes modulated rather than chaotic.
Where to place sensory room equipment: home vs school vs therapy
The essential sensory room equipment changes slightly depending on environment constraints: supervision, turnover frequency, hygiene, and staff training.
Home setups
At home, families can tailor the room closely to one child or one caregiver’s routine. Predictability is easier when the home sensory menu stays stable and changes only after careful observation. Many families succeed with a compact room corner—projector, seating base, and two tactile tools.
A good beginner home approach is to start small for 4–6 weeks, then adjust. Sensory rooms benefit from refinement, not expansion.
School and nursery setups
Schools need equipment that is robust, easy to clean, and safe under supervision constraints. Staff should be able to switch the room from “ready” to “calm mode” in under a minute.
For schools, consistency is everything: standard lighting settings, a single default calm audio option, and a clear sensory menu used by every staff member present.
Therapy settings
Therapists often use sensory rooms to support therapeutic goals—transition regulation, attention readiness, or coping skills practice. Equipment here must support both observation and intervention, with tools introduced systematically.
Therapy rooms benefit from having a clearly defined quiet-down area and recording sheets or simple notes documenting which equipment worked and for whom.
Practical “buy smart” guidance for beginners
Sensory equipment purchases should follow function. The most essential sensory room equipment typically covers: controlled lighting, comfortable posture support, tactile exploration, and at least one proprioceptive regulation option.
Before buying, beginners should measure the room and decide what can stay permanently in place. Then, choose one item per sensory category. Adding equipment is easier later than removing clutter once the room becomes filled.
When budgets are tight, prioritise equipment that reduces risk first (safe surfaces, collision protection, manageable lighting). Then choose equipment that increases consistency (projector light, seating base, tactile tools). This order prevents the room from becoming unusable due to overstimulation or safety concerns.
Some teams find it helpful to align sensory room equipment choices with broader sensory room planning principles, and they often review guidance on who benefits most from using a sensory room to confirm the room’s purpose and usage patterns.
Frequently Asked Questions
What sensory room equipment is essential for a beginner?
The essential sensory room equipment includes controllable lighting (dimmable and low-glare), a comfortable seating/body anchor, safe flooring or protection, and a small set of consistent sensory tools like tactile textures and a visual calm item. Focus on regulation use, not entertainment.
How many items should be in a beginner sensory room?
Most beginners succeed with a limited selection—often 6–12 tools total—with only a few accessible at once. Rotation prevents novelty overload, which is common for children with autism and ADHD.
What is the safest sensory tool to start with?
Tactile textures that are easy to supervise (like a tactile tile set) and visual calm items (like a projector with slow, dim settings) are often good starting points. Choose tools that can be used in short sessions during calm moments.
Can a sensory room help with ADHD and anxiety?
Yes. Many individuals with ADHD and anxiety benefit from predictable sensory cues, reduced noise and glare, and body-based regulation supports. The key is controlled use duration and consistency.
What should be avoided in a sensory room?
Avoid multiple flashing lights, loud sound toys, and too many overlapping stimuli. Reflective surfaces and strong visual motion can overwhelm some autistic individuals, especially when the room lacks start/stop routines.
How long should a beginner use sensory equipment during a session?
Start with short periods—often 2–5 minutes—then expand only if the individual remains regulated afterward. Look for evidence of improved calm, not just immediate attention.
Are sensory rooms useful for dementia or older adults?
They can be valuable when sensory input is gentle, familiar, and offered with comfort and dignity. Choose soft lighting, reduced noise, and simple tactile or visual anchors, while avoiding overstimulation.
Recommended approach: many teams maintain a “sensory log” for 2–4 weeks to track what helps and what escalates. This transforms sensory room equipment from guesswork into evidence-based support.
For beginners, the best starting point is confidence: equip the room to be safe and controllable, then add only the sensory tools that reliably support regulation for the specific person. Over time, the sensory room becomes a trusted environment—a place where needs can be met with consistency rather than chaos.